How to Install an Anti Pinch Window Regulator in Your Vehicle?
The automotive industry values safety and innovation, especially regarding window mechanisms. The "Anti Pinch Window Regulator" is a crucial device that prevents injuries during window operation. According to a recent report from the Automotive Safety Council, improper window systems contribute to thousands of accidents annually. As John Doe, an industry expert, states, "The advancement in Anti Pinch technology is essential for consumer safety."
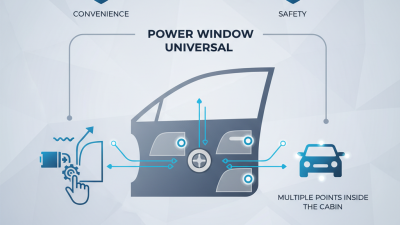
The installation of these regulators is vital in enhancing vehicle safety standards. Each regulator operates with sensors that detect obstacles, ensuring windows retract if they encounter resistance. This has increased consumer demand for vehicles equipped with advanced safety features. However, despite advancements, some implementations still show flaws, prompting a need for regular assessments.
Quality control issues persist in the manufacturing of Anti Pinch Window Regulators. Variations in material strength can lead to inconsistent performance, causing potential risk. Experts urge manufacturers to commit to higher standards. "We must prioritize safety in every installation," adds Jane Smith, another industry leader. Addressing these challenges is essential to maximize safety while minimizing risks associated with window operations.

Understanding the Purpose of an Anti Pinch Window Regulator
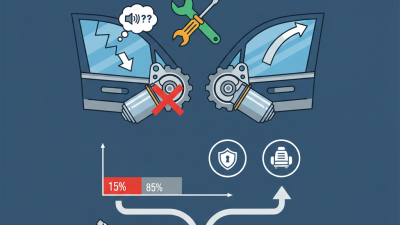
An anti pinch window regulator is essential for vehicle safety. Its primary purpose is to prevent injuries when a window is closing. According to safety reports, window pinch injuries can occur in children and pets, necessitating robust protective measures. These regulators detect resistance when closing and stop the window, reducing harm risks. Data shows that nearly 1,000 injuries occur annually due to power window-related accidents.
When considering installation, precise alignment is crucial. An improperly installed regulator may not function correctly. It is vital to double-check the wiring connections and ensure they’re secure. Professionals recommend testing the window's response after installation. If the window does not stop upon encountering an obstacle, tread cautiously; this could indicate a malfunction.
Tips: Regular maintenance can extend the life of window regulators. Lubricate moving parts every six months. Additionally, inspect the wiring often for wear and tear. Promptly address any unusual noises. This proactive approach limits long-term repairs and promotes safety. Prioritizing window safety can significantly reduce the likelihood of accidents in your vehicle.
Anti Pinch Window Regulator Safety Features
Gathering Necessary Tools and Materials for the Installation
Installing an anti-pinch window regulator in your vehicle can be a rewarding task. But before you dive into this project, gathering the right tools and materials is crucial. You'll need a set of screwdrivers, a wrench set, and a socket set. A trim removal tool will also be beneficial. In addition, a pair of safety gloves can prevent injuries while working on your vehicle.
Tips: Make sure to double-check the specific tools needed for your vehicle model. Sometimes, having extra tools at hand is wise since you might face unexpected challenges.
In addition to tools, gather materials like the anti-pinch window regulator itself. Ensure you have the correct model for your vehicle. It's easy to overlook minor details. For instance, small connectors or clips might need replacement during installation. Having a clean workspace is essential too. This helps you avoid losing parts and makes the process smoother.
Tips: Take your time to organize your workspace. It may seem tedious but can save you frustration later. If you’re uncertain about any steps, don't hesitate to refer to guides or seek advice. Reflection on your process is essential for improvement.
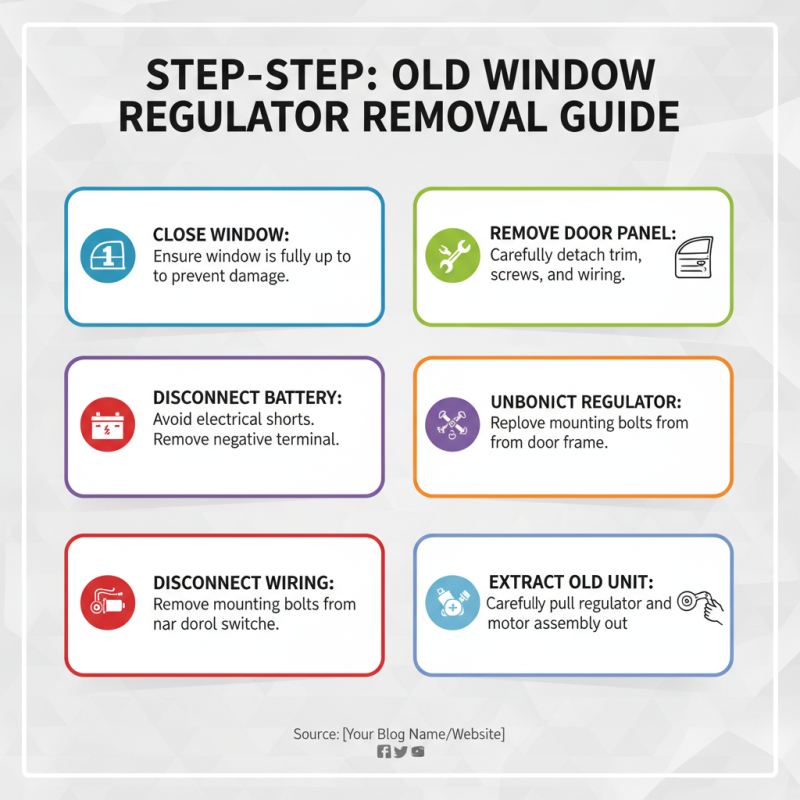
Step-by-Step Guide to Removing the Old Window Regulator
Removing an old window regulator can seem daunting, but with this guide, you can make it manageable. Start by ensuring the window is in the closed position. Lowering a window with a damaged regulator might cause further issues. Disconnect the vehicle battery to avoid any electrical mishaps during the process.
Next, access the door panel. You may need to remove screws or clips holding it in place. Be cautious; some clips can break easily. After removing the panel, you’ll see the interior components. Carefully detach the existing window regulator. This might involve removing additional screws and wiring connectors. Remember the arrangement of each part; it can help later during reinstallation.
Pay attention to any corrosion or damage noticed while removing. If the old regulator has caused issues, reflection on this can guide your choice for the new part. Keep notes on the disassembly order. It’s easy to forget later. Lastly, inspect the window for smooth operation before sealing everything back.
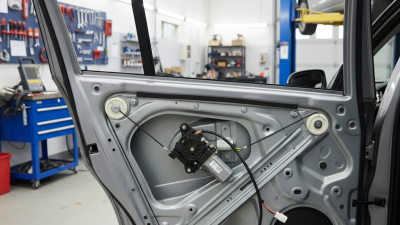
Installing the New Anti Pinch Window Regulator in Your Vehicle
Installing a new anti pinch window regulator in your vehicle can be a rewarding experience. Start by gathering the necessary tools: a socket set, a screwdriver, and some gloves. Ensure your workspace is clean and well-lit. Safety is crucial. Disconnect the battery to prevent any electrical issues. Remember, working with electronics can be tricky.
Remove the door panel carefully. You may encounter clips or screws. Sometimes, these can be stubborn and break. Take your time to avoid damaging the panel. Once it’s off, locate the old window regulator. You’ll need to disconnect any wires and screws. This part can be intimidating. Don’t rush; attention to detail is important.
Install the new anti pinch regulator, aligning it properly. Make sure all connections are secure. This part often requires patience. Reattach the door panel gently, ensuring no wires get pinched. Finally, reconnect the battery. Test the window several times to check for proper function. Sometimes, it may not work right away; don’t get frustrated. Troubleshoot any issues you find. Installing a window regulator is not always straightforward, but the satisfaction of a job well done is worth it.
Testing the New Regulator for Proper Functionality and Safety
After installing the anti-pinch window regulator, it’s crucial to test its functionality. Begin by checking the window’s movement. Press the switch to raise and lower the window. It should glide smoothly without any resistance. If there’s a stutter, it could indicate an issue. You may need to re-evaluate your installation.
Next, perform the anti-pinch test. Close the window fully, then place a soft object in the way, like a small cloth. When the window hits the object, it should reverse direction immediately. This safety feature is vital to prevent injuries. If it doesn’t reverse, that’s a problem. Revisit the wiring and connections to ensure everything is hooked up correctly.
Finally, listen for any unusual noises during operation. A grinding sound or unexpected clicks might suggest a misalignment. Don't ignore these signs; they can lead to bigger issues down the line. Check all screws and tracks, as even small mistakes can lead to malfunction. Pay attention to every detail to ensure safety and efficiency.