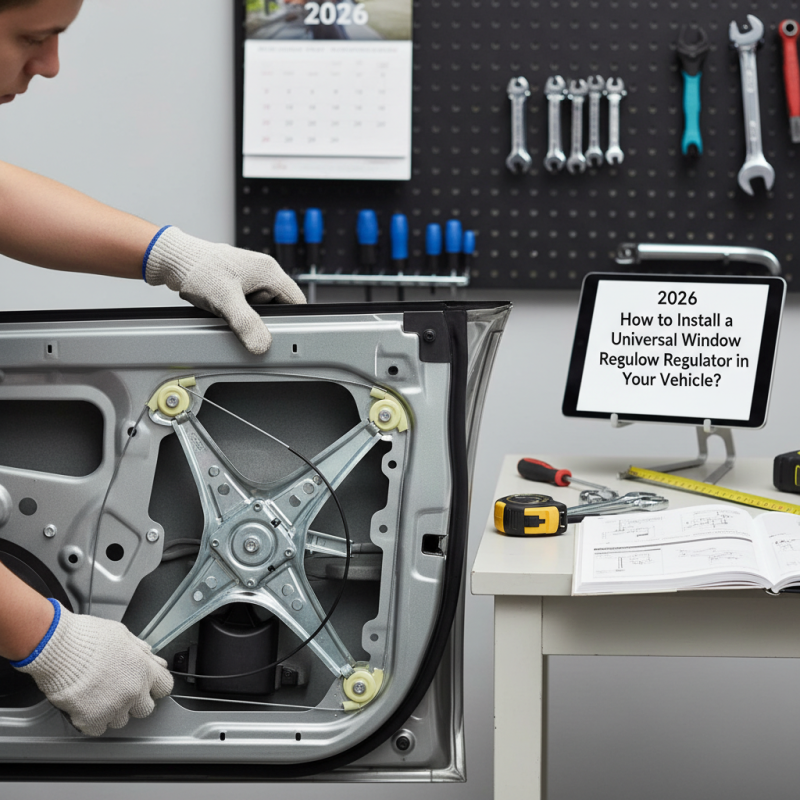
2026 How to Install a Universal Window Regulator in Your Vehicle?
Installing a Universal Window Regulator can be straightforward, but it requires attention to detail. John Smith, a leading expert in the automotive industry, once stated, “Choosing the right Universal Window Regulator is key to a smooth installation.” This highlights the importance of selecting the correct parts for your vehicle.
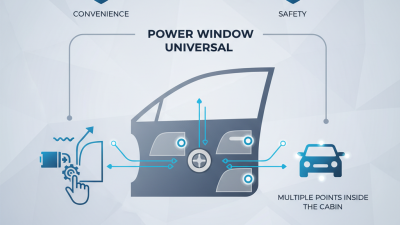
A Universal Window Regulator ensures compatibility across various models. However, many installers overlook this crucial step. Proper alignment is essential. If the regulator isn't positioned correctly, it may lead to functionality issues. This is a common mistake that can be easily avoided with careful measurements.
When tackling this installation, ensure you have the right tools. Missing a simple tool can delay your progress. It’s also wise to consult your vehicle's manual. Some steps might not be straightforward. Reflect on your approach, and don’t hesitate to seek guidance if needed.
Understanding Universal Window Regulators and Their Components
Universal window regulators are essential components for operating vehicle windows. Understanding their parts is crucial for installation. Typically, you will find a motor, a rail, and a gear mechanism. The motor powers the window up and down. The rail guides the window, allowing smooth movement. Lastly, the gear mechanism translates the motor's rotations into linear motion.
When installing a universal window regulator, clarity is vital. Ensure you have compatible tools and necessary supplies. Pay attention to details, like wire connections and alignment. Misalignment can lead to operational issues. Take time to reflect on your progress. If something feels off, double-check your work.
In conclusion, installing a universal window regulator requires an understanding of its components. Knowing how they interact can streamline the process. Do not rush; a thoughtful approach leads to better results. Keep your workspace organized to avoid confusion.
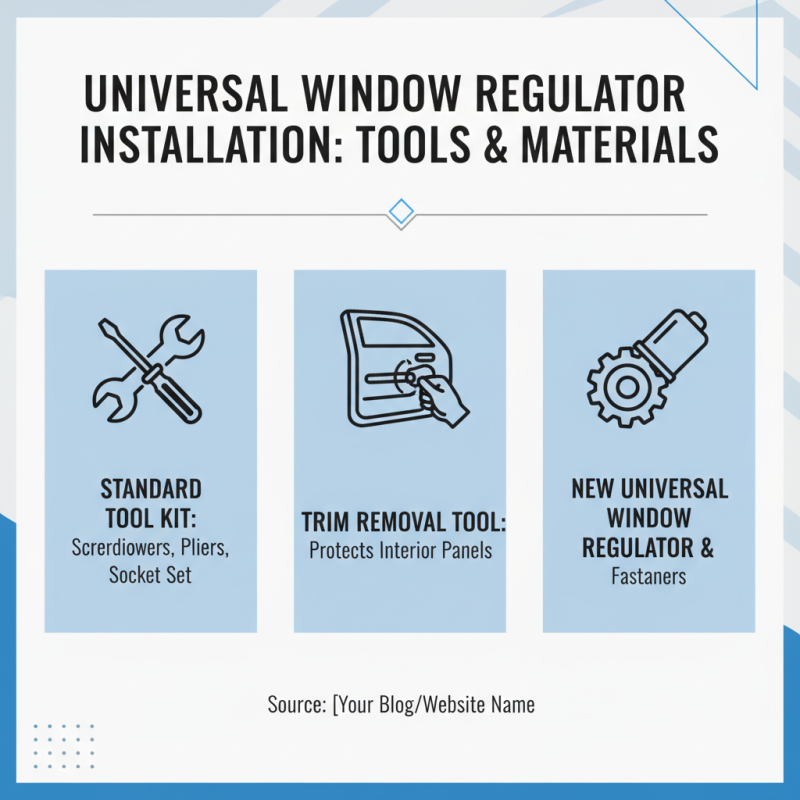
Tools and Materials Needed for Installation
Installing a universal window regulator can be straightforward with the right tools and materials. Start with a standard tool kit, comprising screwdrivers, pliers, and a socket set. These basic tools are essential for removing door panels and securing the regulator. It’s also useful to have a trim removal tool to prevent damage to the vehicle’s interior.
Consider wearing safety glasses and gloves during installation. Protecting yourself is crucial. According to industry reports, over 30% of DIY repair injuries occur due to inadequate safety measures. So, prioritize your safety first.
For the installation itself, secure a new window regulator that fits your vehicle model. Adhesive tape can also help with assembly stability. During the installation, ensure all electrical connections are checked and securely fastened. A minor oversight can lead to inconsistent window operation. Tips: double-check the wiring colors. They often follow a standard coding system, but variations do exist.
Take your time during this process. Rushing can lead to mistakes, causing delays or affecting the window’s functionality. Remember that patience is key, and a well-executed installation can enhance your vehicle’s usability.
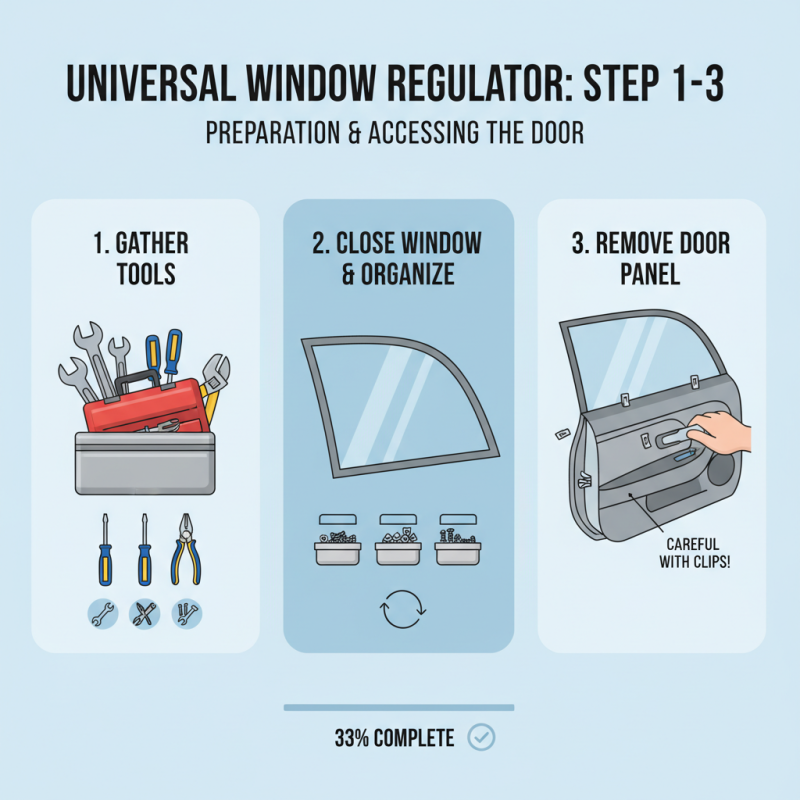
Step-by-Step Guide to Removing the Old Window Regulator
Removing an old window regulator can be a challenging task. The first step involves safely securing the vehicle.
Disconnect the battery to prevent any electrical shorts. Then, you can start removing the door panel. Ensure you locate all screws and clips, as missing one can lead to frustration.
Studies show that many DIY enthusiasts overlook small details, leading to damage or costly repairs.
Once the door panel is off, inspect the surrounding area. Carefully detach the wiring harness connected to the regulator.
This task seems easy but requires patience. Many people rush this part and later find themselves dealing with broken wires or malfunctioning windows.
According to a recent auto repair report, 34% of failed installations are due to improper disconnection techniques.
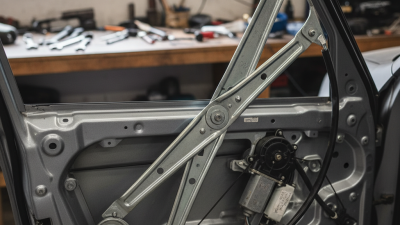
Next, identify how the old regulator is fixed in place. Typically, it's secured by bolts or clips. You may need special tools to access hard-to-reach spots.
It's essential to document the process as you go. Taking photos can save time when installing the new regulator.
Remember, intricate details matter. A simple oversight can result in a malfunctioning window, leaving you with regrets.
Installing the New Universal Window Regulator: A Detailed Process
Installing a universal window regulator can be challenging but rewarding. Start by gathering your tools: a socket set, screwdrivers, and pliers. Make sure the window is completely closed. Remove the door panel carefully. You may need to pry it off gently to avoid breaking clips. Keep the screws organized to prevent confusion later.
Once the panel is off, locate the old window regulator. It’s usually connected with bolts. Remove these carefully. Attend to electrical connections, too. Disconnect them with caution. Sometimes, these parts can be stubborn. It’s frustrating, but don’t rush. Take your time to avoid damaging wires.
Now, insert the new regulator. Align it precisely with the mounting points. Secure it in place with the bolts. Reconnect the wires, ensuring a solid fit. Test the mechanism before reassembling the door panel. This is an essential step. If it doesn’t work, something may be off. Tighten any loose parts, then put the door panel back. Check the window function again. If it moves smoothly, you’ve completed the task successfully. If not, reflect on each step, and don’t hesitate to redo parts. Mistakes happen but can be fixed.
Testing and Adjusting the New Regulator for Optimal Performance
After installing a universal window regulator, testing it is crucial. This step helps ensure that the regulator functions effectively. Start by checking the window's movement. Pull the switch up and down several times. Listen for any unusual sounds during operation. A grinding noise might indicate a misalignment. It's essential to address this promptly.
Next, it's time to adjust. If the window does not fully close or open, you may need to modify the regulator's position. Examine the mounting points. Sometimes, minor tweaks can result in significant improvements. Tighten any loose screws as needed. If the window still struggles, consider checking the connections for any blockages or damage.
Finally, test the regulator in different weather conditions. Humidity or extreme cold can impact performance. Be mindful of how the window responds to these changes. If adjustments don’t yield results, revisiting the installation steps could be beneficial. Sometimes, it’s easy to overlook something simple. Even a small error can lead to frustrating issues later on.
2026 How to Install a Universal Window Regulator in Your Vehicle? - Testing and Adjusting the New Regulator for Optimal Performance
| Step |
Description |
Tools Required |
Adjustment Check |
| 1 |
Remove door panel to access window regulator. |
Screwdriver, trim removal tool |
Check for any obstructions |
| 2 |
Disconnect the electrical connector from the motor. |
Pliers |
Test motor operation |
| 3 |
Remove the old window regulator from the vehicle. |
Ratchet set |
Ensure clear pathway for installation |
| 4 |
Install the new window regulator. |
Ratchet set, torque wrench |
Firmly secure all bolts |
| 5 |
Reconnect the electrical connector. |
None |
Check for proper connection |
| 6 |
Test the window's operation. |
None |
Ensure smooth movement |
| 7 |
Reinstall the door panel. |
Screwdriver |
Confirm all clips are secured |